Debugging PHP application is a pain. When we get problems, we often to use var_dump() or die() in various location to inspect
the variables and then clean them again once the problem is solved.
Fortunately, there is a piece of software called xdebug which can tremendously help us debugging php code. This article is about using xdebug in linux environment.
-
What we need:
- A working apache2 web server with PHP
- Netbeans: an excellent IDE for writing PHP application
- xdebug
- Install xdebug, open linux terminal, change to root and install xdebug with command (pecl install debug). See below
bambang@bambang-notebook:~$ sudo su [sudo] password for bambang: root@bambang-notebook:/home/bambang#pecl install xdebug downloading xdebug-2.1.2.tar ... Starting to download xdebug-2.1.2.tar (Unknown size) .................................done: 1,340,416 bytes 66 source files, building running: phpize Configuring for: PHP Api Version: 20090626 Zend Module Api No: 20090626 Zend Extension Api No: 220090626 ..... .....
Note where the xdebug.so is installed in the line Installing '/usr/local/lib/php/extensions/no-debug-non-zts-20090626/xdebug.so'...... Build process completed successfully Installing '/usr/local/lib/php/extensions/no-debug-non-zts-20090626/xdebug.so' install ok: channel://pecl.php.net/xdebug-2.1.2 configuration option "php_ini" is not set to php.ini location You should add "extension=xdebug.so" to php.ini - Add these lines to your php.ini. In my case /usr/local/lib/php.ini. :
- Restart apache
root@bambang-notebook:/home/bambang# /etc/init.d/apache2 restart * Restarting web server apache2 ... waiting [ OK ] root@bambang-notebook:/home/bambang#
- Write a phpinfo.php page in your web directory like this:
<html> <head> </head> <body> <?php echo phpinfo(); ?> </body> </html>
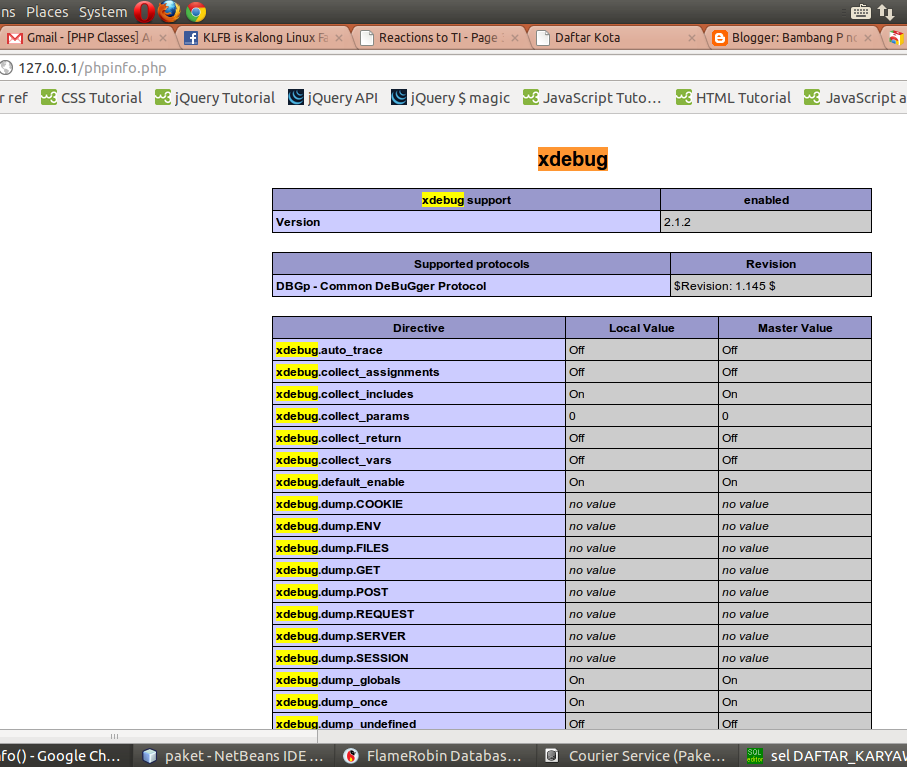
- Open the phpinfo.php in your browser and check whether the xdebug is successfully installed.

- Now go to Netbeans and navigate through menu Tools->Option->PHP and make sure the Debugger port is the same with what we set in the php.ini above. I clear Stop at First Line check mark, but it is okay if you let it checked. If it is checked, the debugger will stop at first php statement. But I only want it stops on break point.
- Open your chrome, goto https://chrome.google.com/webstore/detail/eadndfjplgieldjbigjakmdgkmoaaaoc and install the xdebug helper.
- Now we are ready to debug, in this example I'll debug my CodeIgniter application. First I open one of my controller: daftar_negara.php and place a breakpoint in line 11 by clicking the line number or press ctrl-f8.

- Still inside Netbeans run the debugger by clicking menu Debug->Debug Project or clicking the debug icon in the netbeans taskbar like (see the image below):
The debugger will launch our project in chrome. Now we need to activate chrome xdebug helper, click the xhelper debug icon in right end of the address bar until it turns to green.


- Now press F5 (refresh), xdebug will stop the execution on our breakpoint and switch to our neatbeans:Now, we can step over, step info etc. via netbeans debugger tool bar, of course you can also use the shortcut key (F8,F7 etc):
 We can also inspect the variable values in the window below the code window:

zend_extension="/usr/local/lib/php/extensions/no-debug-non-zts-20090626/xdebug.so"
xdebug.remote_enable=on
xdebug.remote_log="/var/log/xdebug.log"
xdebug.remote_host=localhost
xdebug.remote_handler=dbgp
xdebug.remote_port=9000


I use and recommend CodeLobster IDE for it - http://www.codelobster.com
ReplyDelete